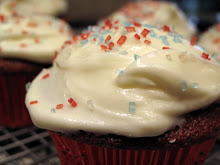
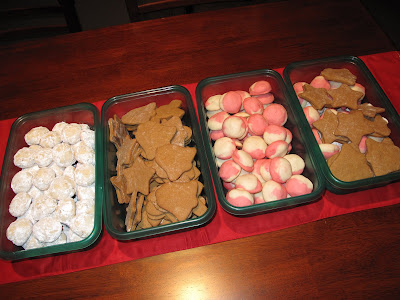
Most years, when I have time, cookies are the gifts that I prepare for our friends and family. In a previous post I shared with you the cookie line up for this year, here is how I packaged them up as gifts.
I bought a box (50) of these kraft colored boxes from Nashville Wraps, they are the perfect size for any baked goods and I really like the naturalness of the kraft color. I tried two different ribbons as you can see in the picture below. The green and red one was the winner as you may have guessed. To keep them on the box I measured them to size and stapled it together on the bottom. I'm planning to use the twine for when I give gifts throughout the year. 
I separated each type of cookie with cupcake wrappers and I wrapped the peppermint bark in cellphone bags.
12.26.2008
Gift Giving
12.21.2008
Peppermint Bark
I have been wanting to make Peppermint Bark for a long time now, just like what they sell in Williams-Sonoma and this year I finally got to it. Of course as in my previous post it did not help that it's so warm here in Atlanta right now but I managed. It's VERY easy and my only change in the recipe (Martha Stewart Recipe) I will make next time is to add peppermint extract to the white chocolate. Here's how it goes:
put the candies in a zip lock bag and beat the heck out of it with a rolling pin or frying pan.
by this point I have already poured out the semi-sweet chocolate and chilled that in the fridge for about 15 minutes and now on top of that pour the white chocolate.
spread the white chocolate out on top of the semi-sweet chocolate
12.19.2008
Cookie Factory
This is what I've been up to lately, it's a lot of work but all worth it in the end.
This years cookie line up was:
Gingerbread Cookies
Noel Nut Balls
Candy Cane Cookies (which thanks to the 70 degree weather this week did not form into candy canes but I'll say pepperment drops)
Spritz Cookies
Also:
Mom's Homemade Fudge
Peppermint Bark
It was funny I was looking forward to baking cookies up here in Atlanta this year because it's always so hot in Miami and the cookies are sometimes not so easy to work with but of all weeks for it to be nice in warm in Atlanta had to be cookie baking week. LOL I almost had to put the air conditioning on, I tell ya.
Here's some pics from the baking extravaganza:

5.11.2008
The Diaper Cake
For anyone interested in making their very own diaper cake here's the recipe:
You will need small diapers, elastic bands and two bottles for the basic construction of the cake - you can then go from there as to how decorative you'd like to make it.
{it's very easy and a great gift}
Start out with about 60 newborn size (or size 1) diapers:
Roll the diaper up starting with the part that goes around the waist:
Next begin forming the center by attaching the rolled up diapers to a bottle and work your way out from there to form the first layer of the cake:
Throughout the construction of the cake you just keep molding it into the round shape that you want. You'll need two baby bottles (or lotion) whatever you'd like to put in the center to build off it. Here's the cake with all three layers complete. Now you'll cover the elastic bands with ribbon:
Here it is with the ribbons added:
The final decorations have been added; you can add all kinds of things to diaper cakes, bibs, pacifers, toy, etc. hang from it. I wanted to keep mine simple. The ribbons where the colors of the shower. I opened the bottle on the top layer and used it to hold some silk flowers and put the final product on a cake stand.Ready for the shower!
I filled the rest of the bottles with M&Ms (same ones we used for the favors) for more decorations around the food table. I am so happy with how the cake came out, I recommend it for all showers.


